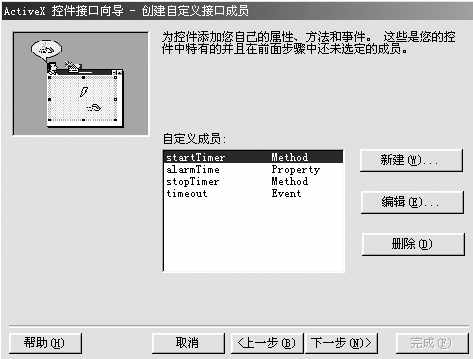
这样就生成了一个简单的定时控件,该控件具有属性:BackColor,BackStyle,BorderStyle,ForeColor,方法:startTimer,stopTimer,事件:timeout,并且自动生成了若干代码。我们在代码窗中分析控件代码,可以发现,属性可以用公用的Property Let 和Get过程来加入,方法就是公用过程(函数或子程序),事件通过Event来声明。
也许我们会问,控件的事件是怎么触发的呢,在编程中我们是可以在需要的地方通过RaiseEvent来触发相应的事件的。
我们补充一些功能代码到其中。
‘开始定时
Public Function startTimer() As Boolean
Timer1.Enabled = True
End Function
‘AlarmTime属性必须要日期类型,所以在Let过程中要做判断。
Public Property Let alarmTime(ByVal New_alarmTime As Date)
If IsDate(New_alarmTime) Then
m_alarmTime = New_alarmTime
PropertyChanged "alarmTime"
End If
End Property
Public Property Get alarmTime() As Date
alarmTime = m_alarmTime
End Property
Public Property Get BackStyle() As integer
BackStyle = Label1.BackStyle
End Property
Public Property Let BackStyle(ByVal New_BackStyle As integer)
Label1.BackStyle() = New_BackStyle
PropertyChanged "BackStyle"
End Property
‘停止定时
Public Function stopTimer() As Boolean
Timer1.Enabled = False
End Function
‘通过Timer来显示时间,并把当前时间与定时时间相比,如果相等,则产生timeout事件
Private Sub Timer1_Timer()
Label1.Caption = Format(Now,"hh:mm:ss")
If Time = alarmTime Then
RaiseEvent timeout
End If
End Sub
自定义控件设计完成,必须进行测试,要在测试过程当中不断改进。
要测试新的ActiveX控件,一般通过生成一个OCX文件,然后开始一个新项目,把自定义控件放在窗体上进行测试。VB也允许将新项目加在现在的项目上,这样,用户就可以测试或修改控件,而不必每次都要设计新项目。我常用后者,下面是我常用的几个步骤。
1.在控件工程中,文件→添加工程→标准EXE。
2.关闭自定义控件设计窗口和代码窗口。
3.把自定义控件引入新添加的工程。
4.设计界面,添加代码,测试。
5.返回自定义控件设计窗口和代码窗口并进行修改。
6.反复测试,直至成1功。
7.设置属性页
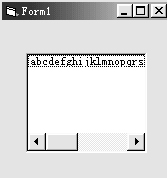
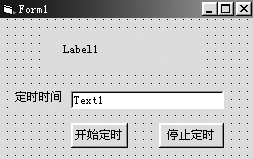
测试时注意必须关闭自定义控件的设计和代码窗口,否则,该控件不能引入测试工程窗口的。按(图10)设计窗体。Label1主要用来显示当前时间。
图10 代码如下:
Private Sub Command1_Click()
If IsDate(Text1.Text) Then mytime1.alarmTime = Text1.Text
mytime1.startTimer
End Sub
Private Sub Command2_Click()
mytime1.stopTimer
End Sub
Private Sub mytime1_timeout()
MsgBox "时间到"
End Sub
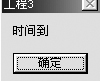
当时间走到定时的时间时,产生timeout事件,该事件只是弹出一个 “时间到” 对话框((图11)0)。
图11
在运行控件编程时,我们会发现有很多控件的某个属性可以下拉选择,而我们使用控件向导时无法实现这样的选择。此时,我们需要一些修改一下程序,使用枚举类型。
在控件代码中增加:
Enum bstyle
border
norborder
transparent
End Enum
把BackStyle属性的Let和Get过程改为:
Public Property Get BackStyle() As bstyle
BackStyle = Label1.BackStyle
End Property
Public Property Let BackStyle(ByVal New_BackStyle As bstyle)
Label1.BackStyle() = New_BackStyle
PropertyChanged "BackStyle"
End Property
这样BackStyle属性有了三种选择0-border,1- norborder,2-transparent。
编后:经过了几周的学习,大家对控件编程也有了更深的了解,但是要想成为高手,还必须多多实践。罗马不是一天建成的,编程是个日积月累的过程。相信大家通过不断的努力,定会成为程序设计高手。我们也会在今后不定期给大家提供一些好的控件资源。